How to Prepare Your Flatbed Trailer for Towing Season: A Complete Spring Checklist
 Neighbors Trailer
Aug 16, 2023 266 8 min read flatbed trailer rental
How to Prepare Your Flatbed Trailer for Towing Season: A Complete Spring Checklist
After months in storage, your flatbed trailer needs more than a quick once-over before it hits the road. Winter weather takes a toll on tires, bearings, brakes, wiring, and deck surfaces—even when the trailer is stored properly. This spring preparation guide walks you through every inspection and maintenance task required to get your flatbed trailer rental-ready and road-safe for the new towing season.
Content updated April 2026.
Why Spring Prep Matters
A flatbed trailer that sat idle through winter can develop problems you will not notice until you are on the highway with a full load. Tires lose pressure and develop flat spots, wheel bearings dry out, brake components corrode, and electrical connections oxidize. Skipping a thorough spring inspection risks breakdowns, cargo damage, and serious safety hazards. Whether you tow for work or list your trailer on Neighbors Trailer for renters, a well-maintained flatbed earns trust, avoids liability, and lasts years longer.
The Complete Spring Prep Checklist
1. Inspect and Inflate the Tires
Start with the tires—they are the only contact between your trailer and the road. Check every tire for cracks in the sidewall, bulges, dry rot, and uneven tread wear. Measure the tread depth; anything below 4/32 of an inch means it is time for replacements. Inflate each tire to the PSI stamped on the sidewall (not the trailer GVWR sticker) using a calibrated gauge. Tires that sat in one position all winter may have developed flat spots; a short drive at low speed usually works them out, but if vibration persists, the tire may need replacing. For guidance on tire selection, see our article on choosing the right trailer tires.
2. Service the Wheel Bearings
Wheel bearings keep the hubs spinning freely and quietly. Over winter, old grease can harden and moisture can infiltrate the seals, leading to corrosion. Remove the dust cap and hub to inspect the bearings for pitting, discoloration, or rough spots. Repack them with fresh, high-temperature bearing grease and replace the seals. Most manufacturers recommend repacking every 12 months or 12,000 miles—spring is the perfect time to stay on schedule. Our wheel bearing maintenance guide covers the full process step by step.
3. Check the Safety Chains
Safety chains are your last line of defense if the coupler separates from the hitch ball. Inspect every link for rust, cracks, or stretching. Make sure the hooks or clips at each end are intact and the chains are the correct grade for your trailer’s GVWR. When hooking up, always cross the chains under the tongue in an X pattern so they form a cradle that catches the tongue if it drops.
4. Test the Lights and Wiring
Rodents love trailer wiring—they chew through insulation during winter storage, creating shorts and dead circuits. Plug in the wiring harness and have a helper confirm that every light works: brake lights, turn signals, running lights, and reverse lights. Check ground connections for corrosion and clean or replace any green-tinted terminals. Apply dielectric grease to all connectors to prevent future oxidation. Towing without functioning lights is both illegal and dangerous.
5. Inspect the Brakes
Whether your flatbed uses electric drum brakes or hydraulic disc brakes, winter corrosion can degrade performance significantly. Remove the drums or calipers and inspect the friction surfaces. Look for rust scoring on drums, glazed or cracked brake shoes, and leaking wheel cylinders. Test the breakaway switch to confirm it activates the brakes independently. If you use an in-cab brake controller, verify the gain setting matches your loaded trailer weight.
6. Examine the Hitch and Coupler
The coupler is the mechanical heart of your towing connection. Check it for excessive wear, cracks, and proper latch engagement. The coupler should fit snugly on the hitch ball with no play when the latch is closed. Grease the coupler’s internal surfaces and the ball socket. Inspect the trailer tongue for bends, rust-through, or weld cracks—especially around the A-frame junction. If you use an adjustable hitch, confirm it is set to the correct height to keep the trailer level. Read more about hitch options in our adjustable hitch guide.
7. Inspect the Trailer Deck
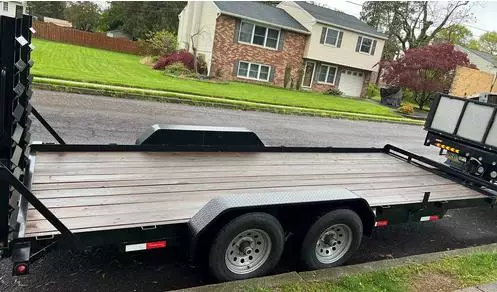
Flatbed decks take a beating from weather, cargo, and UV exposure. Walk the entire deck and press down on each board to check for soft spots indicating rot. Look for warped, split, or loose planks. If the deck is wood, apply a fresh coat of sealant or wood preservative to protect against moisture. Steel and aluminum decks should be checked for rust or corrosion and treated accordingly. A sound deck is essential for safe cargo support. Our guide on trailer deck surfacing covers material options and maintenance tips.
8. Lubricate All Moving Parts
Grease every zerk fitting on the suspension, hinges, ramp pivots, and jack stand. Lubricate the tongue jack gears and check that it raises and lowers smoothly. A well-lubricated trailer operates more quietly, resists corrosion, and puts less stress on components during towing.
Spring Prep Task Reference Table
Use this table as a printable checklist. Work through each task before your first tow of the season.
| Task | What to Check | Tools Needed | Frequency |
| Tires | Pressure, tread depth, sidewall cracks, dry rot | Tire gauge, tread depth gauge | Before every season and every trip |
| Wheel bearings | Pitting, discoloration, grease condition | Jack, wrench set, bearing grease | Every 12 months or 12,000 miles |
| Safety chains | Rust, cracks, stretched links, hook integrity | Visual inspection | Before every season |
| Lights and wiring | All bulbs, ground connections, wire insulation | Test light, dielectric grease | Before every season and every trip |
| Brakes | Shoe/pad thickness, drum scoring, breakaway switch | Jack, drum puller, brake gauge | Every 12 months |
| Coupler and hitch | Latch engagement, wear, tongue cracks | Grease gun, visual inspection | Before every season |
| Deck surface | Rot, warping, loose fasteners, sealant condition | Pry bar, sealant, fasteners | Before every season |
| Lubrication | Zerk fittings, jack gears, ramp pivots | Grease gun | Every 6 months |
Average Cost of Common Spring Maintenance Tasks
Budgeting for spring prep is easier when you know what each service typically costs. The chart below shows average DIY and professional shop costs for the most common maintenance items.
Protect Your Rental with NT Protect
Whether you are taking your own flatbed out for the season or renting one through Neighbors Trailer, make sure every rental includes NT Protect. For just a few dollars per day, NT Protect is mandatory coverage that shields renters from unexpected repair bills caused by accidental damage. It gives both owners and renters peace of mind from the very first haul of the season.
Frequently Asked Questions
How long does a full spring inspection take?
A thorough inspection and basic maintenance—tire checks, bearing repack, light testing, and brake inspection—takes about two to three hours for a handy DIYer. If you need to replace boards or service brakes, allow a full afternoon.
Can I tow my flatbed trailer right out of storage without prepping it?
Technically you can, but it is risky. Tires may be under-inflated, bearings may be dry, lights may not work, and brakes may be corroded. Skipping the inspection puts you, your cargo, and other drivers at risk. Always complete the spring checklist first.
How do I know if my trailer tires have dry rot?
Look for small cracks in the sidewall rubber, especially between the tread blocks. Dry rot appears as a network of fine lines or a chalky, gray discoloration. Tires with visible dry rot should be replaced immediately—they can fail without warning under load.
What grease should I use for wheel bearings?
Use a high-temperature, lithium-complex or marine-grade bearing grease rated for trailer use. Avoid mixing grease types, as incompatible greases can break down and lose their lubricating properties. If you are unsure what was used previously, clean the bearings thoroughly before repacking with fresh grease.
Is it worth paying a shop for spring maintenance or should I do it myself?
Basic tasks like tire inflation, light testing, and chain inspection are easy DIY jobs. Bearing repacking and brake service require moderate mechanical skill and a few specialized tools. If you are not confident working under the trailer, a professional inspection typically costs $100 to $150 and can save you from expensive roadside problems later.