

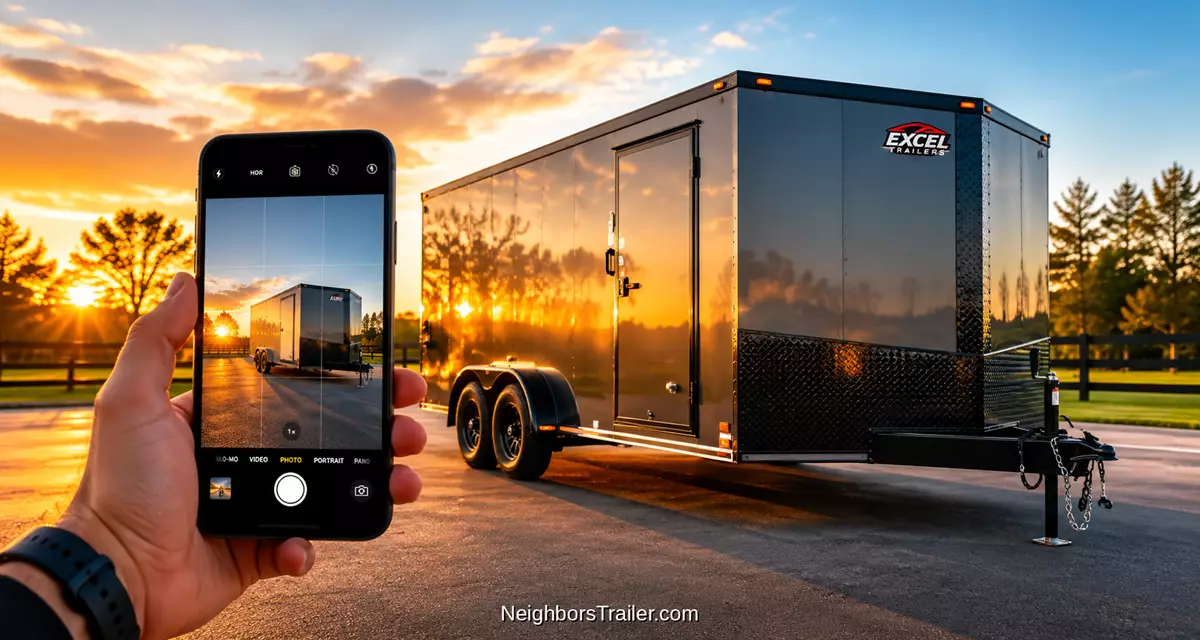
How to Photograph Your Rental Trailer
 Neighbors Trailer
Jun 19, 2026 212 13 min read
The single biggest factor in whether your trailer listing gets booked is not the price, not the description, and not the trailer itself. It is the photos. Renters scrolling through dozens of options spend a fraction of a second on each listing, and the photo is what makes them click or scroll past. Good photos turn a $40-per-day rental into a $40-per-day rental with a calendar full of weekend bookings. Bad photos leave the same trailer sitting unrented through peak season. The good news for owners is that the difference between a great listing photo and a poor one is mostly technique, not equipment. This guide walks through how to photograph your trailer like an experienced host, what shots every listing needs, and the small habits that consistently push booking rates higher.
Why Listing Photos Matter More Than Anything Else
When a renter searches for a trailer in their area, they see a grid of listings, each represented by a single thumbnail photo and a few lines of text. The renter does not read every description. They scan the photos and click on the ones that catch their eye. By the time they have clicked through to the full listing, most other owners have already lost them. Photos do that filtering job.
The conversion math is dramatic. Two identical trailers, at identical prices, in identical locations, can earn radically different revenue based on how well they are photographed. The trailer with bright, clear, well-composed photos gets clicks and bookings. The trailer with dark, cluttered, oddly-angled photos gets ignored. The skill that closes that gap is not difficult to learn, and the return on the time spent is higher than almost any other thing an owner can do.
Before You Pick Up the Camera
Most of the difference between a great photo and a poor one happens before the shutter clicks. Preparation matters more than equipment, and the right preparation takes maybe thirty minutes.
Clean Your Trailer Inside and Out
A clean trailer photographs noticeably better than a dirty one. Wash the exterior, scrub off road grime, and sweep out the interior. Wipe down any visible surfaces. Clean the wheels and tires (wheels in particular catch a surprising amount of attention in photos because they are usually in the lower third of the frame). The thirty minutes you spend cleaning before a photo shoot pays off in every booking that follows for the next year, because the photos are doing the same selling job for as long as they stay on the listing.
Pick the Right Location
The location around the trailer matters as much as the trailer itself. Find a clean, neutral background: an empty parking lot, a quiet driveway, an open field, or a clean garage. Avoid backgrounds with visual clutter (your house, other vehicles, garbage cans, garden hoses). Trees are usually fine. Pavement is fine. Grass is fine. The principle is simple: the background should not compete with the trailer for the viewer's attention. If you have to choose between a pretty location and a clean one, pick the clean one. Our summer maintenance guide covers the cleaning and inspection steps that should happen before the trailer ever sees the camera, since the photos should show the trailer at its best.
Choose the Right Time of Day
The hour before sunset and the hour after sunrise are called golden hour for a reason. The light is warm, soft, and flattering, and almost any object looks better in it than it does at noon. Midday sun creates harsh shadows under the trailer, makes the wheels look almost black, and washes out the colors of the trailer paint. Overcast days are also excellent for trailer photography because the clouds act as a giant softbox, eliminating harsh shadows entirely. Bright midday sun is the only condition to actively avoid.
The Six Essential Shots Every Listing Needs
Renters want to see specific things before they will commit to a booking, and a good listing shows them all six within the first scroll. Skipping any of these creates uncertainty, and uncertainty kills bookings.
The Six Essential Shots
1. The Hero Shot (Three-Quarter Front View)
Front and one side visible. Shows shape and condition at a glance. This is your first photo.
2. The Side Profile
Full side view from a few steps back. Establishes length, height, and overall proportions.
3. The Interior (Enclosed) or Deck (Flatbed)
Shows usable space, floor condition, and tie-down points. Renters need to picture their cargo inside.
4. Close-Ups of Key Features
Ramps, doors, e-tracks, winches, lights, jacks: whatever makes your trailer worth choosing over others.
5. The Coupler and Hitch Area
So renters can confirm coupler size and verify it matches their hitch ball before they book.
6. The Tires and Wheels
Demonstrates tread condition. Old or worn tires in photos cost you bookings; clean tires earn trust.
Composition: The Things That Make Photos Feel Right
Composition is the difference between a photo that looks like a snapshot and one that looks like a listing. A few simple principles cover most of it.
Rule of Thirds
Imagine the frame divided into thirds horizontally and vertically (a tic-tac-toe grid). Place the trailer along one of those lines rather than dead-center. Most phone cameras can overlay this grid on the screen as a guide; turn it on. Off-center composition feels more dynamic and professional than dead-center placement. The trailer should occupy roughly two-thirds of the frame for the hero shot, with some breathing room around it.
Get Low, Get Wide
Photographing a trailer from standing height tends to look amateur because it foreshortens the trailer and makes it look smaller than it is. Crouch down so the camera is at roughly the trailer's wheel-well height. Suddenly the trailer looks substantial, the wheels look more prominent, and the photo feels intentional rather than casual. The same trick that makes cars look better in advertising photos works for trailers.
Frame the Whole Trailer
Avoid cropping the trailer awkwardly at the edges of the frame. A small amount of space around the trailer (sky above, pavement below, a bit of room left and right) makes the trailer feel grounded and properly framed. A trailer crammed corner-to-corner in the frame feels squeezed and chaotic.
Lighting Basics
Light is the second most important thing after composition, and there is no substitute for shooting in good light.
Golden Hour Is Your Friend
The hour after sunrise and the hour before sunset are the best times to photograph anything outdoors. The light is warm, low-angled, and forgiving. Plan your shoot for one of these windows whenever possible. Shadows are soft, colors are saturated, and the trailer takes on a slight golden tone that flatters most paint colors.
Overcast Days Work Surprisingly Well
If golden hour is not available, an overcast day is the next best thing. The cloud cover diffuses sunlight evenly, eliminating the harsh shadows that ruin midday photos. The colors come out slightly muted but the photo feels even and professional. Many professional product photographers prefer overcast conditions to direct sun.
Avoid Harsh Midday Sun
The single condition to avoid is bright, direct, overhead sun. It creates dark shadows under the trailer, blows out highlights on metal surfaces, and makes color reproduction look harsh. If you must shoot in midday sun, find shade with even lighting (the side of a building, under a large tree) rather than mixing sun and shadow on the same trailer.
Indoor Shots Need Window Light
If you must photograph in a garage or shop, open the door and let natural light flood in. Position the trailer with its best angle facing the light source. Overhead fluorescent lights produce an unflattering greenish tint that no amount of editing fully corrects.
Phone or Camera?
A modern smartphone camera is more than adequate for great listing photos. Almost every smartphone from the last five years has a camera that can produce sharper, better-exposed images than what most owners need for a listing. If you already have a smartphone, you do not need a camera. The technique covered in this guide matters far more than the equipment. Camera owners can absolutely use their gear if they prefer, but a phone is not a limitation.
What NOT to Include in Your Photos
Just as important as what to include is what to leave out. A few categories of content consistently cost owners bookings when they appear in listing photos.
Background Clutter
Garbage cans, garden hoses, lawn equipment, other vehicles, your kids' toys, the neighbors' fence in the background. Anything that draws the eye away from the trailer makes the photo feel chaotic and unprofessional. Take the extra two minutes to move the trailer to a clean backdrop rather than trying to crop or photoshop clutter out.
Personal Items
Avoid showing license plates clearly enough to read (privacy), avoid showing your house number, and avoid family members or pets in the frame. The listing is about the trailer, not about you. Personal items also create the impression that the trailer is not really a professional rental, which subtly reduces renter confidence.
Other Vehicles
Your truck, your boat, your neighbor's car, anything parked behind the trailer. Each one pulls focus away from the listing subject. If you cannot move the trailer away from other vehicles, change your shooting angle to crop them out.
Weather Damage or Wear
Photos taken in the rain, with snow on the trailer, or after a long muddy job, all communicate "neglected" even if they are technically fine. Wait for clean conditions before shooting. If your trailer has visible wear (faded paint, rust spots), photograph it in flattering light and from angles that minimize the wear; do not hide it entirely, since renters will see it at pickup, but do not lead with it either.
Quick Editing Improvements
A few small edits transform good photos into great ones. Modern phones have built-in editors that handle every adjustment described below in seconds.
Brightness and Exposure
If a photo looks slightly dark, brighten the shadows and lift the exposure by a small amount until the trailer looks naturally lit. Avoid going so far that highlights blow out (bright spots turn pure white). The goal is to recover detail in dark areas, not to make the whole photo bright.
Crop and Straighten
Always check that the horizon (or the ground line) is level in the final photo. A tilted horizon feels off even when viewers cannot articulate why. The crop function in any phone editor includes a level adjustment. Use it on every photo. Also crop tight enough to remove distracting edges while leaving the breathing room around the trailer covered earlier.
Do Not Over-Filter
Avoid heavy filters, dramatic color shifts, vintage effects, or anything that calls attention to the editing rather than the trailer. The goal is for photos to look natural and accurate. Renters expect the trailer they see in the photo to match the trailer they pick up. A heavily filtered listing photo creates a small letdown at handoff and a higher chance of negative reviews.
The First Photo Matters Most
The order of photos in a listing matters because the first photo is what appears in the search grid. Make the hero shot (the three-quarter front view from a low angle, in good light) the first photo in your listing. This is the image doing the heavy lifting on whether someone clicks through at all. Save the close-up detail shots for later in the photo sequence, after the renter has already decided your listing is worth a closer look.
Common Mistakes That Tank Conversion
Across thousands of listings, the same handful of mistakes appear over and over. Knowing them in advance helps you avoid them.
| Mistake | Why It Hurts | The Fix |
|---|---|---|
| Only one photo | Renters cannot evaluate condition or features from one image | Include at least six photos covering the essentials above |
| Photos taken at noon | Harsh shadows, washed colors, unflattering light | Shoot at golden hour or on overcast days |
| Cluttered background | Eye is drawn away from the trailer; listing looks unprofessional | Move trailer to a clean location before shooting |
| Trailer is dirty | Communicates poor maintenance and neglect | Wash and clean before any photo session |
| Photo taken from standing height | Foreshortens the trailer, makes it look small and casual | Crouch to wheel-well height for hero shots |
| Heavy filters applied | Creates mismatch between photo and reality at handoff | Light edits only: brightness, crop, straighten |
| Hero shot buried at position 5 or 6 | Search grid shows a weaker photo; click-through rate drops | Re-order photos so hero shot is first |
| No interior or deck shot | Renters cannot picture their cargo inside | Include at least one shot showing usable space |
A Quick Photo Refresh Strategy
Listing photos do not have to be a one-time project. The best hosts re-shoot every twelve to eighteen months, especially after any visible upgrade to the trailer (new tires, new paint, new accessories). A photo refresh has measurable impact on bookings, particularly heading into peak summer season. If your listing has been live for a year or more with the original photos, an afternoon spent re-shooting is one of the highest-leverage time investments you can make as a host.
It is also worth periodically checking how your listing photos look on a phone screen (which is how most renters browse) versus a computer. Photos that look fine on a desktop monitor sometimes lose detail on small phone screens. Test by viewing your own listing on a phone and adjusting if needed.
The Bottom Line
The owners who consistently outperform on bookings are not the ones with the newest trailers or the lowest prices. They are the ones whose listings look professional in a sea of mediocre ones. A clean trailer, a clean background, golden-hour light, the six essential shots, and a clear hero shot at position one. That is the formula. Most owners can implement it in a single afternoon, and the return shows up in the booking calendar for as long as the photos stay live.
Ready to refresh your listing? If you are already hosting on Neighbors Trailer, plan a thirty-minute shoot during the next overcast afternoon or golden-hour window. If you are considering listing for the first time, take the time to do photos right before the listing goes live. The first impression is the one that determines whether your listing earns bookings or sits idle through peak season. Before you set your rental rates, know what your trailer is worth as an asset. Our Trailer Value calculator gives you a ballpark market value so you can price your rental with confidence.