

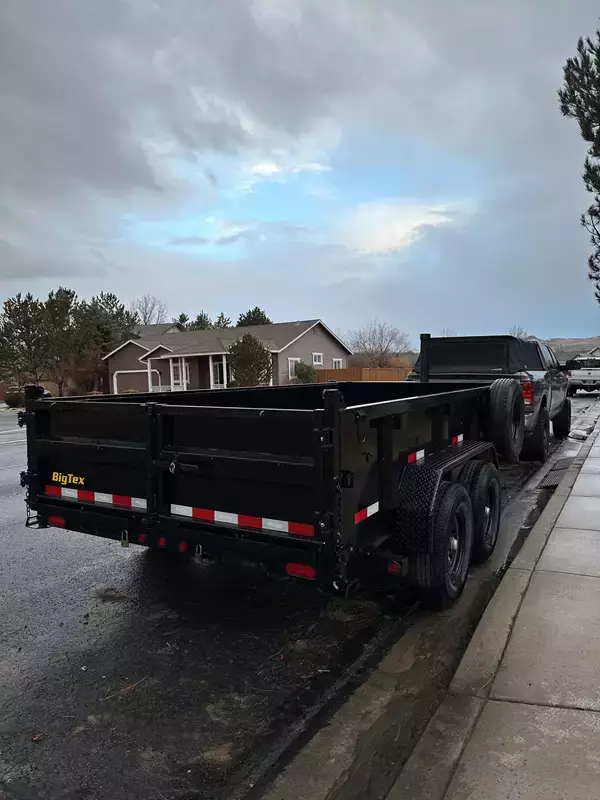
Important Tips on Cleaning a Dump Trailer Rental Properly
 Neighbors Trailer
Jun 25, 2023 642 9 min read dump trailer rental
Returning a dump trailer rental in clean, undamaged condition is one of the most important responsibilities a renter has. Dump trailers work hard—they carry concrete debris, yard waste, gravel, demolition material, and soil. Each load leaves behind residue that, if ignored, can corrode metal, jam hydraulic components, and create genuine damage liability for the renter. Cleaning the trailer thoroughly before returning it is not just good etiquette—it protects your deposit and your reputation on the platform.
This guide walks you through exactly how to clean a dump trailer rental properly, what supplies you need, how long it takes, and what areas renters most commonly miss. Whether you hauled a single load of mulch or spent a weekend on a demolition project, these steps apply.
Why Proper Cleaning Matters More Than You Think
Dump trailers are high-use equipment. The owners who list their trailers on Neighborstrailer.com rely on them for consistent rental income, which means condition matters both to the owner and to the next renter. Residue left in a trailer bed can chemically react with metal surfaces—concrete and certain soils are particularly corrosive—and hardened material left to cure overnight can be extremely difficult to remove.
Beyond cosmetics, debris left in the bed affects how the trailer dumps on the next job. Hydraulic tailgates that are clogged or dirty can malfunction. Dirty hinges seize. And a trailer returned visibly soiled may result in a cleaning fee charged to the renter.
Supplies You'll Need Before You Start
Have these supplies ready before you begin cleaning the trailer—it makes the process faster and avoids multiple trips:
| Supply | Purpose | Notes |
| Garden hose or pressure washer | Rinse loose debris and rinse final surfaces | Pressure washer is strongly preferred for hardened loads |
| Stiff-bristle push broom or scrub brush | Break up dried material before rinsing | Metal bristles for concrete; nylon for painted beds |
| Concrete dissolver / muriatic acid solution | Remove hardened concrete or mortar splatter | Use gloves and eye protection; rinse thoroughly after |
| Degreaser spray | Clean hydraulic fluid residue and oil spots | Especially important around the lift cylinder area |
| Rubber gloves and eye protection | Personal safety | Required when using chemical cleaners |
| Leaf blower or air compressor | Clear out fine dust and lightweight debris from corners | Great for yard waste, sawdust, and dry soil |
| Lubricant (WD-40 or similar) | Re-lubricate hinges, tailgate pins, and pivot points after washing | Prevents rust after water exposure |
Step-by-Step: How to Clean a Dump Trailer Rental
Step 1: Dump Any Remaining Load
Before cleaning begins, make sure the trailer is fully emptied. Raise the bed and allow any loose material to fall out completely. Lower the tailgate and use a broom to push out any material clinging to the gate or the front wall of the bed. Do not spray water into a loaded or partially-loaded trailer—it adds significant weight and makes the cleanup harder.
Step 2: Sweep Out Loose Debris
With the bed still raised (if safe and stable), sweep from the front of the bed toward the tailgate opening. Use a stiff push broom. Pay attention to the corners where the side walls meet the bed floor—debris accumulates there and is easy to miss. Lower the bed before moving to the next step.
Step 3: Pre-Soak Dried or Hardened Material
If you hauled concrete, mortar, or clay-heavy soil, pre-soak the bed with water for 10–15 minutes before scrubbing. This softens the material significantly. For hardened concrete or mortar, apply a concrete dissolver product according to label instructions and let it dwell for the recommended time. Do not use muriatic acid on painted surfaces without knowing what finish the trailer has—test a small area first.
Step 4: Scrub and Pressure Wash
Work from front to back, scrubbing with your brush and following with the pressure washer. Hold the pressure washer wand at an angle—not straight down—to push debris out through the tailgate rather than deeper into corners. Pay special attention to the tailgate hinges, the underside of the bed (if accessible), and the hydraulic cylinder housing area.
Step 5: Clean the Exterior and Undercarriage
Rinse the exterior sides of the trailer bed, the frame, and the wheels. Mud and grit packed around the axles and wheel wells can conceal damage and also leads to rust. A quick rinse takes only a few minutes and makes a strong impression when returning the trailer.
Step 6: Inspect the Tailgate and Hinge Mechanism
After washing, open and close the tailgate to confirm it swings and latches properly. Look for debris lodged in the hinge pivot points. If the tailgate feels stiff, apply lubricant before returning. This is one of the most frequently cited issues in post-rental inspections.
Step 7: Dry and Lubricate
Allow the trailer to air dry or wipe down key metal areas with a dry cloth. Apply a light coat of lubricant to the tailgate pins, the hinge points, and any pivot arms connected to the hydraulic lift. This step takes less than five minutes and significantly reduces wear on the trailer.
Cleaning Time Estimates by Load Type
| Load Type | Typical Cleanup Time | Special Considerations |
| Yard waste / mulch / leaves | 10–20 minutes | Leaf blower first, then rinse; check corners for compacted material |
| Dry soil / gravel / sand | 15–25 minutes | Rinse thoroughly; fine sand clings to surfaces and scratches metal |
| Wet soil / clay | 25–40 minutes | Pre-soak required; clay smears if you try to brush it dry |
| Demolition debris / wood | 20–35 minutes | Watch for nails and sharp fasteners; sweep before rinsing |
| Fresh concrete / mortar | 30–50 minutes | Must be cleaned before it cures; concrete dissolver may be needed |
| Hardened / cured concrete | 60–90 minutes | Chemical treatment required; can result in damage claim if left |
| Mixed debris (renovation project) | 30–60 minutes | Multiple passes; inspect floor surface for embedded material |
The Areas Renters Most Commonly Miss
After reviewing countless rental returns, these are the spots renters consistently overlook:
- Front wall of the bed: Material packs against the front wall when braking and often dries there. Scrub this area deliberately.
- Tailgate hinges: Grit in the hinge pins causes damage over time. A quick spray and wipe keeps them functional.
- Underside of the hydraulic cylinder: Soil and gravel pack underneath the lift cylinder and its mounting bracket. This area is easy to miss because you're not looking straight at it.
- Wheel wells and frame crossmembers: Mud caked here hides corrosion and is flagged by experienced owners during inspection.
- The exterior of the tailgate: The inside gets cleaned, but the outer face—which scrapes against debris as the trailer backs up—often gets ignored.
What Happens If You Return a Dirty Trailer
On Neighbors Trailer, each rental agreement includes return condition expectations. If a trailer is returned with significant residue, hardened material, or damage attributable to improper use or neglect, the owner can document and file a claim. NT Protect covers accidental damage during the rental period, but a cleaning fee for a failure to clean is a renter responsibility—not a covered event. The best approach is always to return the trailer at least as clean as you received it.
Frequently Asked Questions
Can I use a pressure washer on any dump trailer?
Most dump trailers can be pressure washed safely, but avoid directing high-pressure water at electrical connections, the trailer brake assembly, or directly into the hydraulic cylinder seals. Use a medium pressure setting and keep the wand moving rather than holding it in one spot.
What do I do if I accidentally left concrete to harden in the trailer?
Act as quickly as possible. Fresh concrete is much easier to remove than cured concrete. Apply a concrete dissolver product and let it dwell, then scrub and rinse. For large areas of hardened concrete, contact the trailer owner immediately and discuss the situation rather than returning the trailer without addressing it.
Is cleaning the trailer included in the rental fee?
No. On Neighbors Trailer, the renter is responsible for returning the trailer in clean condition. Some owners may have an optional cleaning fee add-on in their listing, but that does not substitute for basic debris removal—it typically covers light surface cleaning only.
How long before my return time should I start cleaning?
Budget at least 30–60 minutes depending on your load type (see the table above). Don't wait until the hour of return. If you hauled anything that hardens, clean it immediately after dumping—even before you're done with the job if possible.
Do I need to oil the trailer hinges after washing?
Yes, ideally. Water exposure accelerates rust on bare metal components. A quick application of WD-40 or a dry lubricant to the tailgate pins and hydraulic arm pivot points after washing keeps the hardware in good condition and reflects well on your care of the rental.
Conclusion
Cleaning a dump trailer rental properly is a straightforward process when you approach it systematically. Start by fully emptying the load, sweep out loose material, pre-soak any hardened residue, pressure wash front to back, clean the exterior and undercarriage, and finish with lubrication of the mechanical components. The whole process takes 20–60 minutes depending on what you hauled. That investment of time protects you from damage claims, ensures a good review from the owner, and keeps the trailer in great shape for the next renter.
If you're planning your next project and need a dump trailer, visit Neighborstrailer.com to find peer-to-peer dump trailer rentals near you—at rates significantly lower than traditional rental companies.
Related Articles
- Towing Capacity Explained: GVWR, GCWR & Payload
- Trailer Inspections: What You Need to Know Before You Rent or Tow
- Important Safely Reminders While Using a Dump Trailer
- Ultimate Trailer Towing Safety Guide
Content Update: This guide was substantially updated in March 2026 with expanded towing safety guidance, improved equipment recommendations, and additional resources to help trailer owners tow safely and confidently.