

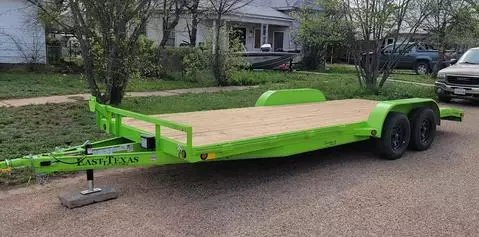
How to Repair Wooden Flooring on a Flatbed Trailer Rental
 Neighbors Trailer
Aug 13, 2023 715 10 min read flatbed trailer renta
How to Repair and Replace Wooden Flooring on a Flatbed Trailer
Wooden flooring on a flatbed trailer takes a beating every time you load equipment, haul lumber, or strap down a vehicle. Over months and years of use, that constant stress leads to cracked boards, soft spots, and eventually rot that compromises the structural integrity of the entire deck. Whether you own a flatbed or list one as a flatbed trailer rental on Neighbors Trailer, keeping the floor in solid condition is not optional. A deteriorating deck puts your cargo at risk, creates liability concerns, and shortens the working life of the trailer itself.
This guide walks through every stage of a flatbed trailer floor repair, from initial inspection and damage assessment through board removal, replacement, and long-term surface protection. By the end, you will know how to identify the warning signs of floor failure, choose the right replacement materials, and seal the new surface so it lasts for years.
Signs Your Flatbed Trailer Floor Needs Repair
Visible Rot and Soft Spots
The most obvious sign of floor trouble is wood that feels spongy underfoot or crumbles when you press a screwdriver into it. Rot typically starts from the bottom where moisture collects between the boards and the steel crossmembers. By the time you can see discoloration or smell mildew on the top surface, the damage has usually spread well beyond the visible area. During your inspection, probe every board with a flathead screwdriver or awl. Sound wood resists penetration, while rotted wood gives way easily.
Warped, Split, or Cracked Boards
Boards that have cupped, bowed, or split along the grain are structurally weakened even if the wood has not started to rot. Splits allow water to reach the crossmembers below, accelerating corrosion on steel frames and creating more moisture pockets for future rot. A single cracked board might hold light loads, but under the concentrated pressure of a forklift wheel or a heavy piece of equipment, that crack can become a complete failure point.
Loose or Missing Fasteners
Check every bolt head and carriage bolt on the deck. Fasteners that have backed out, rusted through, or are missing entirely mean the boards are no longer firmly secured to the frame. Loose boards shift under load, which damages adjacent boards and can cause cargo to shift unexpectedly during transport. If you find more than a handful of missing fasteners across the deck, it is worth pulling boards to inspect the crossmembers underneath for corrosion damage as well.
Tools and Materials You Will Need
Before you start pulling boards, gather everything you need so the job does not stall halfway through. At a minimum, you will need a circular saw or reciprocating saw for cutting replacement boards, a drill with socket adapter for removing and installing carriage bolts, a pry bar for lifting damaged boards, a tape measure, a speed square, replacement lumber (typically 2x8 or 2x6 rough-cut oak or treated pine), carriage bolts with nuts and washers, wood preservative, and a sealant such as epoxy resin or marine-grade polyurethane. For larger jobs, a trailer deck resurfacing approach may be more efficient than patching individual boards.
Step-by-Step Floor Repair Process
Step 1: Inspect and Map the Damage
Walk every inch of the deck and mark damaged areas with chalk or spray paint. Categorize each section as either repairable (surface cracks, minor wear) or requiring full replacement (rot, structural splits, missing sections). Sketch a simple diagram of the deck layout showing which boards need to come out. This map saves time during removal and ensures you cut the right number of replacement boards before you start.
Step 2: Remove Damaged Boards
Use a socket wrench or impact driver to remove the carriage bolts holding each damaged board to the crossmembers. If bolts are rusted in place, apply penetrating oil and let it soak for 15 to 20 minutes before trying again. For severely corroded bolts, cut them with an angle grinder or reciprocating saw with a metal-cutting blade. Once the fasteners are out, use a pry bar to lift the board free. Work carefully to avoid damaging adjacent boards that are still in good condition.
Step 3: Clean and Treat the Crossmembers
With the boards removed, you have direct access to the steel crossmembers underneath. This is your best opportunity to address any corrosion before it gets worse. Wire-brush loose rust, apply a rust converter or primer, and let it dry completely. If you skip this step, moisture trapped between new boards and rusty steel will accelerate rot in your replacement lumber from day one.
Step 4: Cut and Fit Replacement Boards
Measure the gap left by each removed board and cut your replacement lumber to fit. Oak is the traditional choice for flatbed trailer decks because of its density and resistance to wear, but pressure-treated Southern yellow pine is a more affordable alternative that performs well when properly sealed. Whichever species you choose, make sure the boards are dry before installation. Green or wet lumber will shrink as it dries, opening gaps between boards that allow water infiltration and reduce load support.
Step 5: Install and Fasten New Boards
Set each replacement board onto the crossmembers and drill through for new carriage bolts. Use grade 5 or higher carriage bolts with flat washers and lock nuts to prevent loosening from road vibration. Tighten bolts snugly but avoid over-torquing, which can crush the wood fibers and create a weak point around the fastener hole. Once all boards are secured, walk the entire deck to confirm there are no high spots or gaps wider than 1/8 inch between boards.
Step 6: Seal and Protect the Surface
Apply a wood preservative to all surfaces of the new boards, including the underside and end grain where moisture enters fastest. After the preservative dries, coat the top surface with epoxy resin or marine-grade polyurethane to create a waterproof barrier. For trailers that see regular heavy use, consider adding a layer of rumber composite decking on top of the wood for additional wear and moisture protection.
| Decking Material | Avg. Cost per Board Foot | Lifespan (Years) | Best For |
| White Oak (rough-cut) | $3.50 - $5.00 | 15 - 25 | Heavy equipment hauling |
| Red Oak | $2.50 - $4.00 | 10 - 18 | General-purpose flatbeds |
| Apitong (Keruing) | $5.00 - $7.50 | 20 - 30 | Commercial and logging trailers |
| Treated Southern Yellow Pine | $1.50 - $3.00 | 8 - 15 | Budget-friendly replacements |
| Rumber (recycled rubber composite) | $4.00 - $6.00 | 25 - 50 | Maximum durability, moisture resistance |
| Douglas Fir | $2.00 - $3.50 | 8 - 12 | Lighter loads, dry climates |
| Steel Tread Plate | $6.00 - $10.00 | 30+ | Permanent no-maintenance solution |
Choosing the Right Replacement Material
The decking material you choose affects the trailer's load capacity, maintenance schedule, and total cost of ownership. Oak remains the industry standard for good reason: it handles point loads from forklifts and equipment legs without crushing, and its tight grain resists splintering. If budget is a concern, treated pine offers reasonable performance at roughly half the cost, but it wears faster under heavy use and needs to be resealed more frequently.
For owners who want to eliminate wood rot entirely, rumber composite boards made from recycled tires offer an appealing long-term solution. Rumber does not absorb water, does not rot, and does not require sealing. It is heavier than wood, which slightly reduces payload capacity, but its lifespan of 25 to 50 years makes it cost-effective over time. Apitong is another premium option favored by commercial fleets for its exceptional hardness and natural oil content that resists moisture, though it comes at a higher price point and can be harder to source locally.
NeighborsTrailer.com
Preventing Future Floor Damage
A successful repair is only half the job. Without ongoing maintenance, new boards will deteriorate just as quickly as the old ones. After every use, sweep debris off the deck and clear any standing water. Reapply sealant once a year or whenever you notice the surface absorbing water instead of beading it off. Store the trailer under cover or with a fitted tarp when it is not in use. For trailers used as rentals on the Neighbors Trailer marketplace, a well-maintained deck directly translates to better reviews and higher booking rates.
Pay special attention to the areas where boards meet crossmembers. These junctions trap moisture and are the first places rot returns. Applying a bead of silicone caulk between the board and the steel beam during installation creates a moisture barrier that significantly extends the floor's life. Also consider adding drain holes or a slight crown to the deck profile so water runs off rather than pooling in the center. Routine trailer maintenance, including floor inspections, should happen at least twice a year.
How NT Protect Covers Your Flatbed Trailer Rental
If you rent your flatbed trailer through Neighbors Trailer, NT Protect is automatically included with every booking at just a few dollars per day. This mandatory coverage protects the trailer against accidental damage during the rental period, giving both owners and renters peace of mind. For owners, it means a renter's honest mistake does not come out of your pocket. For renters, it means you can focus on getting the job done without worrying about every scratch or ding on the deck.
Frequently Asked Questions
How do I know if my flatbed trailer floor needs replacement versus repair?
If a screwdriver sinks more than half an inch into the wood with light hand pressure, that board needs replacement. Surface cracks and minor wear can usually be repaired with epoxy filler and resealing, but rot, structural splits, and boards that flex visibly under load should be pulled and replaced entirely.
What is the best wood for a flatbed trailer deck?
White oak is the most popular choice because it combines density, wear resistance, and availability. Apitong is harder and more moisture-resistant but costs more. Treated Southern yellow pine works well for budget-conscious repairs, though it wears faster under heavy loads.
How often should I reseal the wooden floor?
At minimum once per year. If the trailer is stored outdoors or used frequently in wet conditions, inspect the sealant every six months and reapply as soon as you notice the wood absorbing water rather than repelling it.
Can I replace individual boards or do I need to redo the entire deck?
Individual board replacement is perfectly fine and is the most common approach. As long as the surrounding boards and the steel crossmembers are in good shape, there is no reason to tear out the entire deck. Just make sure replacement boards match the thickness of the existing ones so the deck surface stays level.
How much does it cost to replace a flatbed trailer floor?
A full deck replacement on a standard 20-foot flatbed typically costs between $800 and $2,500 in materials for a DIY job, depending on the wood species. Professional installation can add $500 to $1,500 in labor. Replacing just a few boards usually costs $50 to $200 in materials.
Related Articles
- Essential Guide to Trailer Deck Surfacing
- Flatbed Trailer Rental Surfacing Facts
- Advantages of Aluminum Flatbed Trailer Rentals
- Flatbed Trailer Rental Winter Storage Tips
Content updated April 2026