

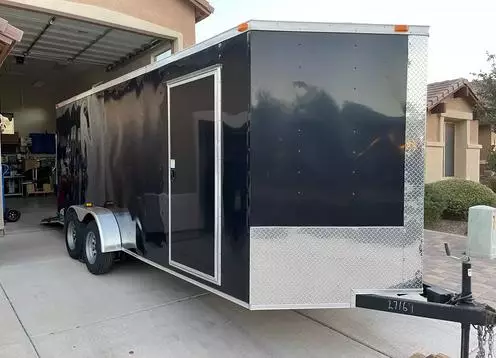
How to Replace Bearings on Your Trailer
 Neighbors Trailer
Aug 31, 2023 1458 8 min read trailer bearing replacemen
Wheel bearings are the single most overlooked maintenance item on a cargo trailer. They spin thousands of revolutions per mile, carry the full weight of the trailer and its load, and rarely get any attention until they fail on the side of the highway. A failed bearing can lock a wheel, ruin an axle spindle, and in the worst case throw a tire across the road. The good news is that replacing wheel bearings on a cargo trailer is a straightforward job that a reasonably confident DIYer can handle in an afternoon with basic hand tools. This guide walks through the full process end to end.
Why Bearings Fail
Trailer wheel bearings live in a harsh environment. They run hot on long hauls, cool fast when you hit a puddle, and are constantly exposed to water, dust, and road salt. A dry bearing can self-destruct in under 100 miles. A contaminated bearing can run for a while but will pit, score, and eventually seize. Regular repacking with fresh grease and periodic replacement are the only ways to keep bearings alive long term.
Most manufacturers recommend repacking bearings every 12,000 miles or annually, whichever comes first. Full replacement is typically called for every 25,000 to 50,000 miles, with higher end trailers and sealed-bearing designs pushing those intervals further. A renter-owner whose trailer gets hammered weekly should err on the earlier side.
Tools and Parts You Will Need
Gather the supplies below before starting. Few things are more frustrating than finding out you are missing a 3/4 inch socket after the trailer is on jack stands.
| Category | Specific Item | Why You Need It |
| Lifting | Floor jack plus two jack stands | Lift and safely support the axle |
| Hand tools | Socket set, breaker bar, torque wrench | Lug nuts, spindle nut, reassembly torque |
| Specialty | Bearing race driver, seal installer | Seat new races and grease seals cleanly |
| Consumables | High-temp wheel bearing grease | Pack the new bearings |
| Parts | Inner and outer bearings, races, grease seal, cotter pin | Always replace as a full kit per hub |
| Cleaning | Solvent, lint-free rags, shop gloves | Remove old grease and debris |
Before You Start: Safety Checks
Park the trailer on a flat, level surface. Chock the wheels that are staying on the ground. Never work under a trailer supported only by a hydraulic jack. Always use jack stands rated for at least the trailer's loaded weight. Disconnect the trailer from the tow vehicle before lifting, or leave it coupled and the tow vehicle in park with the parking brake set. If your trailer has electric brakes, disconnect the tow vehicle's 7-pin plug so you do not energize the brakes by accident.
Step-by-Step Bearing Replacement
1. Raise the Wheel
Position the floor jack under the axle tube near the hub you are working on. Lift until the tire just clears the ground. Slide a jack stand under the axle and lower the trailer onto it.
2. Remove the Wheel
Break the lug nuts loose with the wheel still in contact with the ground if possible. Once the trailer is on jack stands, remove the lug nuts and pull the wheel off.
3. Pop Off the Dust Cap
Use a flat pry tool or a dedicated dust cap remover. Work around the cap's edge so it comes off evenly without deforming.
4. Remove the Cotter Pin and Spindle Nut
Straighten the cotter pin with needle-nose pliers and pull it out. Unthread the spindle nut by hand. The washer behind it will come off next.
5. Slide Off the Hub Assembly
Wiggle the hub straight off the spindle. The outer bearing will fall into your hand as the hub clears the spindle; be ready to catch it. Place the hub on a clean rag.
6. Extract the Old Bearings and Races
Pry the grease seal out of the back of the hub. The inner bearing will come out with it. To remove the races pressed into the hub, tap them out evenly from the opposite side using a brass drift or a race-driver set. Never use a hardened steel punch directly on a race. It can shatter.
7. Clean Everything
Wipe all old grease out of the hub interior and off the spindle. A solvent rinse followed by clean rag wipes gets you down to bare metal. Inspect the spindle for scoring or heat discoloration; a damaged spindle means the axle itself may need replacement.
8. Install the New Races
Tap the new inner and outer races into the hub with a race driver. The race is fully seated when it stops making the metallic ring on each tap and the sound becomes a dull thud.
9. Pack the New Bearings
Place a dollop of high-temperature wheel bearing grease in your palm, press the widest side of the bearing into it, and scoop grease through the rollers until it squeezes out the opposite side. Rotate and repeat until every roller is packed. A bearing packer tool speeds this up substantially.
10. Reassemble
Install the inner bearing, drive in a new grease seal flush with the hub face, slide the hub back onto the spindle, install the outer bearing, washer, and spindle nut. Tighten the spindle nut while rotating the hub, back it off a quarter turn, then re-snug by hand. Install a new cotter pin and bend it around the castle nut. Refill the dust cap with grease and tap it into place.
11. Torque the Lug Nuts
Mount the wheel, hand-tighten the lugs, lower the trailer so the tire contacts the ground, then torque the lugs in a star pattern to the manufacturer's specification. Recheck lug torque after the first 25 miles, then again at 50 miles.
Maintenance Interval Expectations
The chart below shows the typical service life of cargo trailer bearing components when regularly maintained versus when neglected. The data comes from aggregate service records across common axle brands and is a useful rule of thumb for planning.
NeighborsTrailer.com
Warning Signs a Bearing Is About to Fail
Do not wait for a roadside seizure to schedule a bearing service. The warning signs are usually obvious if you know what to listen and feel for.
A grinding or growling noise from a wheel at highway speed is almost always a dry or damaged bearing. A hub that is hot to the touch after a short drive is another warning. Looseness or play when you grab the tire at 12 and 6 o'clock and rock it indicates bearing wear. Any of these signs mean service now, not after the next trip.
When to Call a Professional
Wheel bearings are well within reach of a weekend DIYer, but a few situations call for a shop visit. If the axle spindle is scored, bent, or heat-discolored, an axle replacement is likely needed and is not a driveway job. If the trailer has sealed bearings or oil-bath hubs, the procedure differs from the tapered roller setup covered above. And if you find metal flakes in the old grease, the damage likely extends beyond just the bearings themselves.
For more on trailer component upkeep, see the trailer tire maintenance guide. Trailers with neglected bearings often have equally neglected tires.
Frequently Asked Questions
How often should I repack my trailer wheel bearings?
Every 12,000 miles or once a year for trailers that see regular use. Boat trailers and trailers that are frequently submerged should be repacked more often, sometimes seasonally.
Can I reuse old bearings if they still look good?
Only if the bearing, race, and rollers show no pitting, scoring, or bluing. When in doubt, replace. The parts cost for a single hub is typically under $50; the cost of a roadside bearing failure is much higher.
Do I need to replace the race when I replace the bearing?
Yes. Bearings and their mating races wear together. Putting a new bearing on an old race accelerates wear and can cause premature failure.
What is the correct torque for the spindle nut?
Most tapered roller trailer hubs specify snugging the nut while rotating the hub, then backing off one-quarter turn and finger-tightening to the next cotter pin hole. Check your axle manufacturer's spec; torque values vary.
What kind of grease should I use?
Use a high-temperature wheel bearing grease rated for trailer wheel service. Automotive chassis grease is not a substitute. For boat trailers, use marine-grade waterproof wheel bearing grease.
Final Thoughts
A few hours of bearing work every year or two is far cheaper than a roadside tow or a bent axle. The procedure is simple, the parts are inexpensive, and the safety benefit is enormous. If you run a cargo trailer as a rental side business, staying ahead of bearing maintenance keeps your five-star reviews intact and your trailer earning. For a broader look at the economics of trailer ownership and rental, the trailer owner income guide is worth a read.
Related Articles
- Ways to Keep Trailer Tires in Excellent Condition
- How to Choose the Right Tires for Your Trailer
- Essential Guide on Trailer Deck Surfacing
- How to Make Money With a Trailer and Be Your Own Boss
Content updated April 2026