

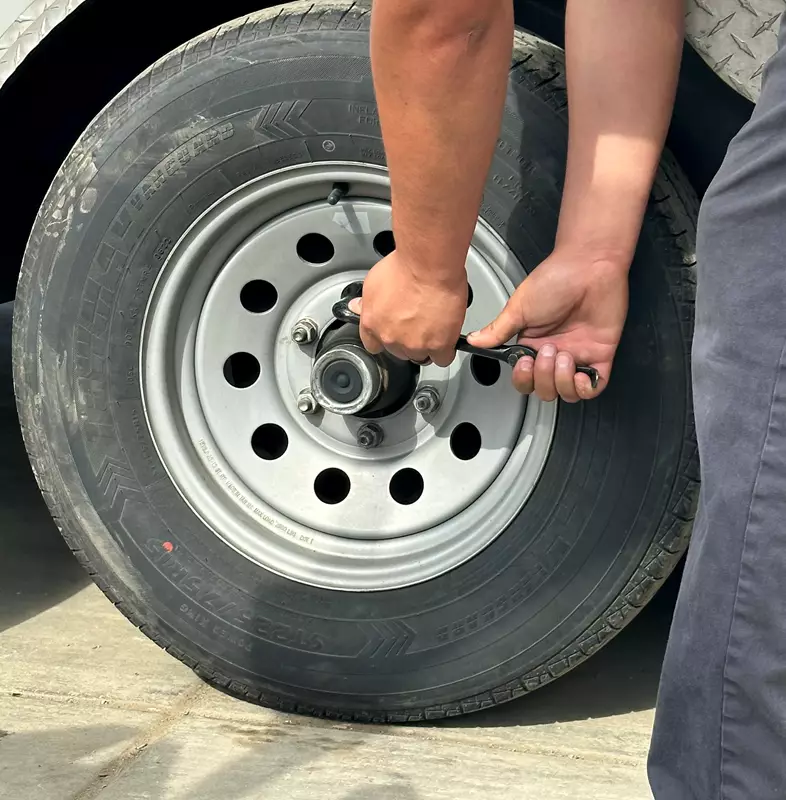
How to Remove Stubborn Lug Nuts From Your Trailer
 Neighbors Trailer
Jul 1, 2023 1171 8 min read flatbed trailer rental
Why Lug Nuts Get Stuck on Trailer Wheels
If you have ever tried to remove a lug nut from a trailer wheel and found it nearly impossible to budge, you are not alone. Stubborn lug nuts are one of the most common mechanical challenges trailer owners and renters face. Whether you are dealing with a flatbed trailer rental, a utility trailer, or your own personal equipment, seized lug nuts can halt your plans and create real safety hazards. Understanding why lug nuts seize is the first step toward fixing the problem safely.
Lug nuts become stuck for several reasons. Corrosion is the most common culprit, especially on older trailers exposed to rain, road salt, and moisture. Over time, rust bonds the nut to the wheel stud. Cross-threading is another common cause: a lug nut installed at an angle damages both the nut and the stud. Overtightening with an impact wrench causes galling, a type of metal friction weld that makes removal extremely difficult without special tools.
Tools You Need to Remove Stubborn Lug Nuts
Having the right tools before you start is critical. Attempting to force a stubborn lug nut without proper equipment can damage the wheel stud, the wheel hub, or injure you. Here is what you should have on hand:
- A breaker bar or long-handled wrench for additional leverage
- A penetrating lubricant such as PB Blaster, WD-40, or Liquid Wrench
- A wire brush to clean away surface rust before applying lubricant
- An impact wrench with appropriate sockets
- A torch or heat gun for extreme cases of corrosion
- A lug nut extractor socket set for rounded nuts
- An angle grinder with a cut-off wheel as a last resort
Investing in quality tools pays off over the long run. If you own or regularly rent trailers, keeping a basic lug nut removal kit in your vehicle can save hours of roadside frustration. Proper equipment also complements good maintenance habits; our guide on keeping trailer tires in excellent condition covers additional preventive steps that keep your wheels road-ready.
Step-by-Step Guide to Removing Stubborn Lug Nuts
Step 1: Soak with Penetrating Oil
Before applying any mechanical force, spray the seized lug nut thoroughly with penetrating oil. Work the spray nozzle around the base of the nut to reach the threads. Allow the lubricant to soak for at least 15 to 30 minutes; for heavily corroded nuts, overnight soaking produces the best results. Tap the nut lightly with a hammer after soaking to help the lubricant penetrate deeper into the threads.
Step 2: Apply Mechanical Leverage
A standard lug wrench may not generate enough force for a seized nut. Switch to a breaker bar with a correctly sized socket. For additional leverage, fit a steel pipe over the breaker bar handle to extend it. Apply steady downward pressure rather than jerky movements to avoid rounding the nut. Counterintuitively, try tightening the nut slightly first before loosening; this can break the corrosion bond.
Step 3: Apply Heat
If penetrating lubricant and a breaker bar are not enough, applying heat can expand the metal and break the corrosion bond. Use a propane torch or heat gun and apply heat directly to the lug nut for 30 to 60 seconds. Let it cool slightly, then attempt removal again. Never apply heat near fuel lines, tires, rubber seals, or brake fluid components.
Step 4: Use a Lug Nut Extractor Socket
If the lug nut has become rounded from previous removal attempts, a lug nut extractor socket is the right tool. These sockets feature reverse spiral grooves that bite deeper into the nut as you apply force. They are available at most auto parts stores and are sized to match common lug nut dimensions used on utility and flatbed trailers.
Step 5: Cut as a Last Resort
When all else fails, a lug nut can be cut off using an angle grinder with a cut-off wheel. This method destroys the nut but preserves the stud when done carefully. Make two cuts on opposite sides of the nut, then pry it off with a chisel. Always wear eye protection and heavy gloves when grinding near wheel components.
Lug Nut Torque Specifications by Trailer Type
After removing a stubborn lug nut and replacing it with a new one, proper torque is essential. Under-tightening can allow the wheel to come loose while driving, and overtightening causes the galling that leads to the next seized lug nut. Always use a torque wrench and tighten to the manufacturer specification for your trailer type. The chart below illustrates recommended torque ranges for the most common trailer categories.
Recommended lug nut torque by trailer type (ft-lbs). Always confirm specifications with your trailer manufacturer.
| Trailer Type | Lug Nut Size | Torque Range (ft-lbs) | Thread Direction |
| Utility Trailer | 1/2 in. (12.7mm) | 80-90 | Right-hand thread |
| Flatbed Trailer | 9/16 in. (14.3mm) | 95-105 | Right-hand thread |
| Car Hauler | 9/16 in. (14.3mm) | 100-115 | Right-hand thread |
| Enclosed Trailer | 1/2 in. (12.7mm) | 85-95 | Right-hand thread |
| Dump Trailer | 5/8 in. (15.9mm) | 110-125 | Right-hand thread |
Preventing Lug Nuts from Seizing in the Future
Prevention is far easier than removal. Once you have replaced your lug nuts, a few simple maintenance practices will keep them from seizing again. Apply a thin coat of anti-seize compound to the wheel studs before installation. This lubricant prevents metal-to-metal bonding and corrosion without affecting the torque reading. Inspect your trailer lug nuts every 3,000 miles or at least once per season, tightening any that have loosened and checking for signs of rust or damage. Our guide on storing your trailer safely in the winter has additional tips on protecting wheel hardware from seasonal corrosion.
If you rent or list trailers on Neighbors Trailer, performing a quick lug nut inspection before and after each rental is considered best practice for both owners and renters. NT Protect coverage is available for a few dollars per day and provides financial protection against damage claims during a rental, giving everyone involved confidence on every trip.
When to Replace Wheel Studs
Sometimes the problem is not just the lug nut but the wheel stud itself. If a stud has been stripped, snapped, or damaged during removal, it must be replaced before the wheel can be safely used again. Signs of a damaged stud include visible cross-threading marks, a stud that spins freely when you try to tighten the nut, or visible cracks in the shank. Wheel stud replacement is a moderately complex repair that most mechanics can complete in under an hour. Never drive with a missing or damaged wheel stud, as uneven load distribution can cause catastrophic wheel separation at highway speed.
Understanding the full wheel system means looking beyond the lug nut. Knowing how to choose the right tires for your trailer is another important part of maintaining a safe and reliable wheel assembly for every trip.
Frequently Asked Questions
Can I use WD-40 to remove a stuck lug nut?
WD-40 works as a light penetrating lubricant for mildly corroded lug nuts. For severely seized nuts, a dedicated penetrating oil like PB Blaster or Liquid Wrench will perform significantly better. Apply generously and allow adequate soak time before attempting removal.
How do I know if my lug nut is cross-threaded?
A cross-threaded lug nut will feel gritty or uneven as you try to turn it, and it may spin without making progress. You may also notice visible damage to the threads on the stud. Cross-threaded studs should be replaced before installing new lug nuts.
Is it safe to drive with a loose lug nut?
No. A loose lug nut puts abnormal stress on the remaining nuts and can lead to wheel separation while driving. If you notice vibration, wobbling, or hear a clunking sound from a wheel area, pull over immediately and check all lug nuts before continuing.
How often should I check trailer lug nuts?
Check lug nut torque before every trip and again after the first 50 miles of a new journey. New hardware often seats slightly during initial use, causing a small amount of torque loss. Re-torque as needed and verify regularly throughout long hauls.
What size socket do I need for trailer lug nuts?
The most common trailer lug nut socket sizes are 3/4 inch, 13/16 inch, and 7/8 inch. Refer to your trailer owner's manual or measure the flat-to-flat distance across the lug nut to determine the correct socket size before you begin.
Conclusion
Removing stubborn lug nuts from a trailer is a manageable task when you have the right tools and a systematic approach. Start with penetrating oil and allow adequate soak time, work up to a breaker bar, apply heat for extreme cases, and know when to replace the wheel stud entirely. After every removal, install new lug nuts with anti-seize compound and torque them to the correct specification. Keeping your trailer wheels properly maintained is a critical safety responsibility for every driver and passenger on the road.
Related Articles
- Ways to Keep Trailer Tires in Excellent Condition
- How to Choose the Right Tires for Your Trailer
- Storing Your Trailer Safely in the Winter
- A Complete Guide to Understanding Trailer Classes
Content Update: This guide was substantially updated in March 2026 with expanded towing safety guidance, improved equipment recommendations, and additional resources to help trailer owners tow safely and confidently.